How to Recover Photos from a Write-Protected SD card or USB drive
Summary: – The below article will guide you on how to recover photos from a write-protected SD card or USB drive through Stellar Photo Recovery Software.
Sometimes, you often get the message “disk is write protected” and you suddenly cannot access your USB drive or SD card. Even, the disk doesn’t allow you to format or cut-paste photos from the storage media. The question comes there off, how to remove the write-protection and recover back the photos?
This guide will tell you about the tricks to remove the write-protection from USB drive or SD card and to get access to the photos or recover them back.
Most of the SD cards or USB drive have a write-protection switch. Generally, if you on/off the switch, you can get rid of the write-protection message which blinks on your screen. You just have to slide the lock on opposite direction to unlock it. You can easily detect, if there is any marking for the lock or unlock on your SD card.
Sometimes the message is displayed even if the write-protection switch is OFF. In such case, the below tricks will help. Write-protection doesn’t even will allow formatting the USB drive or the SD card. However, you can remove the write-protection by the help of few commands in the Windows Registry.
To know in detail, about how to recover the photos from a write-protected SD card or USB drive, here is a step by step guide.
- Stellar Photo Recovery Software
To recover your photos from a write-protected USB drive or SD card, download Stellar Photo Recovery Software. The Photo Recovery Software will scan your USB drive or SD card to retrieve photos and save at your desired destination.
Steps to run the software
- Launch Stellar Photo Recovery on your computer.
- On the home screen of the software – ‘Select What to Recover’. Click Next.
- Next, select the location from where you want to recover. Click Scan to start the scanning process
- A dialog box of ‘Scanning Completed Successfully!’ displays the scan results – number of files found and size of the data. In the left-pane of main window, all the recovered data is listed. You can preview them in the right pane.
Note: If you do not see the required videos in the list, opt for Deep Scan option at the bottom. - Click Recover. You can also choose to recover only the selective files – select photos that you need, right click, and click Recover.
- In the dialog box, specify the location to save the image files. Click Save. All the files get saved at the specified location Click Save. All the video get saved at the specified location.
- Run an Antivirus Software

It has been found that the write-protection error can originate from various Trojans and viruses affecting the memory card. So a frequent or a routine check of your memory cards is essential. After a virus/Trojan scan, your memory card can get rid of write-protection error also.
- Remove Write-Protection with the help of Regedit
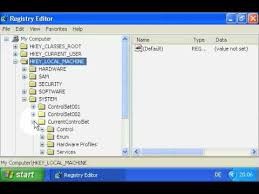
You can remove the write-protection from your SD card or USB drive with the help of Regedit
With the help of a Registry editor, many errors can be solved by simply following the steps below
- Click Start > type “regedit” and open “Registry Editor”.
- Now follow the below path after opening registry editor: –
HKEY_LOCAL_MACHINE/SYSTEM/CurrentControlSet/Control/StorageDevicePoliciesÂ
- Now you will see “Write Protection” option. Double click on that and set the value data to ‘0’.
After setting the value data to ‘0’ again try copying or formatting your SD card. Follow the nest steps, if still your issue is not solved.
4. Another method of removing the write-protection is by using Diskpart.
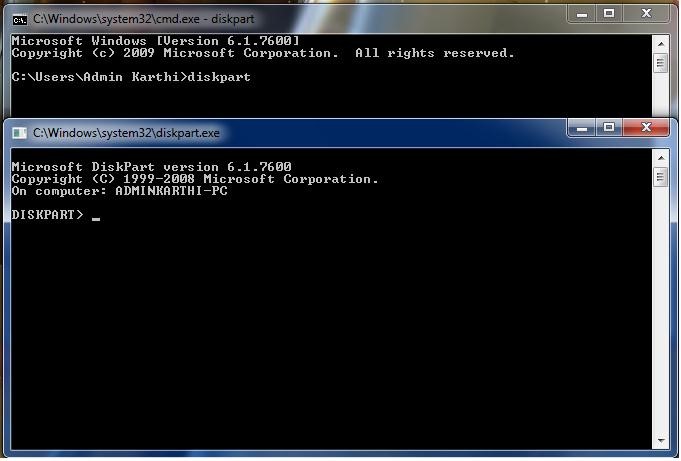
1.Launch the command prompt by Searching for cmd.exe in the start menu. In Windows XP, click Start then Run, and typecmd.exein the box.
diskpart
list disk
select disk x (where x is the number of your USB flash drive – use the capacity to work out which one it is)
attributes disk clear readonly
clean
create partition primary
format fs=fat32 (you can swap fat32 for ntfs if you only need to use the drive with Windows computers)
exit
5. Disabling the files
- Right click on the memory card
- Select properties and then under the securities tab, you should be able to find your name as administrator
- Change the permission for the SD card to “Read & Write,” “Read & Execute,” or “Full Control.”
- Using the above way, you can remove the write-protection authority on your SD card or USB flash drive
Wrapping Up:
Thus, Write-Protection is no more a challenge. If your SD card has turned up write-protected and you are looking for options to fix it to recover your photos back, then we are sure that any one of the above-mentioned techniques can definitely solve the issue!
how to remove the write-protection from SD card? The card is still saying to be write protected after unlocking the switch
You can Double-click on the WriteProtect value in the right-hand pane of Regedit.exe. Here you change the Value data from 1 to 0 and click OK to save the change. Close Regedit and restart your computer and restart your computer to find your SD card to be no longer write-protected
Please guide on on how to format a write protected Micro SD card?
First, make sure that the lock switch button is in the unlocked position. You can try a third party SD Formatter software also.
How to erase a write-protected USB drive or SD card
You should first try to remove the write-protection from your storage media before you can erase anything. Steps to remove write-protection is mentioned in the post above.
How to fix SD Error 0x8007045D?
It may be possible that your SD card is not compatible or may be corrupt. You can try few manual fixes to recover your corrupt SD card.